


It’s a matter of fact that making a timeline in PowerPoint is a step-by-step task. First, pick a good timeline framework or use a ready-made timeline template. This is the base for making your timeline. Then change the timeline to fit your presentation.
This could mean changing the timeline format or adding a timeline picture or image. A timeline maker can make the whole process as easy as pie! So, it will let you make a visual timeline effectively. Finally make sure the timeline shows your project timeline accurately for a complete timeline presentation.
Understanding the importance of timelines in presentations
It’s well known that timelines in presentations give a nice-looking and easy-to-understand picture of the following things-
- Progress
- Key dates
- Targets
By using a timeline template, you can change the timeline to fit your needs and make a clear project timeline that everyone can understand.
It’s beyond dispute that making a timeline involves using a timeline maker for your presentation. The timeline format can change based on your data, with choices that include a timeline picture or visual timeline. It’s no secret that no matter the format, a well-done timeline image improves the quality of your timeline presentation.
To make sure the timeline framework is right, it’s crucial to know the exact order of events or procedures. This not only makes your timeline better, but also makes your presentations clearer and more efficient.
The role of timelines in business presentations
It’s obvious that timelines add a visual part to chronological data and let viewers easily understand complex information through a timeline format. Generally, using a timeline maker, stakeholders can easily see a project timeline, which can make the presentation simpler and more efficient.
It’s just surprising how timeline slides make a clear story-line that can effectively show the order of a project! Making a timeline often involves using timeline templates. This can then be changed to fit the specific needs of a project. Obviously, a well-structured timeline presentation not only improves communication but also makes the presenter look better.
The role of Bonsai in project management
Bonsai plays a crucial role in project management by offering robust tools for creating detailed project timelines and managing timesheets. Its platform allows teams to visualize the entire project lifecycle, from inception to completion, and other timeline views. Bonsai offers comprehensive solutions that bring together every aspect of your projects under one intuitive platform.
Benefits of using timelines in PowerPoint
It’s crucial to be aware that making a timeline in PowerPoint has many benefits. One big benefit is the visual timeline it gives, helping to show data clearly. This is especially helpful for project managers who can use timeline slides to effectively show project timelines. The benefit of doing this is it gives the audience an easy-to-understand view of information.
It’s worth noting that PowerPoint’s built-in timeline maker makes the timeline creation process simpler, offering many timeline templates that users can change to fit their needs. Undoubtedly a properly formatted timeline picture or timeline image can make a presentation look better and be more effective.
Getting started with PowerPoint timelines
One thing is for sure: PowerPoint is a good timeline maker; its timeline templates offer a visual timeline format. Making a timeline involves picking a good template, putting in your data, etc.
It’s significant to note that the project timeline can be made better with pictures and graphics using the provided timeline framework. This gives your timeline slides a much-needed edge and coherence. Notably, you can easily change your timeline to add or remove events and change colors and designs as needed. There is no denying that the ability to make a timeline in PowerPoint is indeed an essential skill for all presenters.
Choosing the right PowerPoint version
It’s interesting to point out that when working on a timeline presentation, the choice of PowerPoint version is vital. Some versions of PowerPoint offer advanced features like a strong timeline maker, making the timeline creation process easier. This includes features like the following-
- Professional timeline templates
- Tools for changing your timeline’s layout
One thing is certain: the right PowerPoint version gives you a variety of timeline formats, like a timeline picture or a timeline graphic. The visual timeline part is key for an effective timeline presentation. The great thing is it makes your project timeline clear.
So, choose your PowerPoint version wisely to better manage your timeline creation along with making a powerful presentation.
Understanding PowerPoint's interface
It’s indisputable that PowerPoint’s interface is user-friendly and helps in the smooth creation of timeline presentations. Making a timeline involves using a timeline maker which allows for easy structuring of a timeline framework. Notably, key features include timeline templates which help create a timeline in a visually appealing way.
It’s no secret that the interface lets you fully change the timeline format. The good news is you can change the timeline graphic and image to fit your project.
Step-by-step guide to creating a timeline in PowerPoint
It’s a matter of fact that making a timeline in PowerPoint starts with picking the right timeline templates. Think about the following things-
- The project timeline
- How long is it?
- Key events before choosing a template
Then, change the timeline with specific dates, events, and details. This is when the timeline maker tool in PowerPoint is useful.
The suggestion here is to add a timeline image or graphic if needed to make a more visual timeline. These images could be relevant photos or diagrams that match the project’s progress, making it engaging.
Check your timeline slides to make sure all information is correct and visually appealing. By using PowerPoint’s timeline template and visual tools effectively, you can make an impressive and efficient timeline!
Step 1: selecting the right timeline template
It’s no secret that the first step in making the timeline is choosing the right timeline template. There are many timeline templates available. Usually, think about things like content, timeline format, etc. when choosing a template.
It’s well known that good timeline slides need a good framework and this can be made sure using a timeline maker. This tool makes it easier to change your timeline graphic, and import your data. It’s crucial to realize that the timeline image should be clear and easy to understand and support your timeline presentation effectively.
Remember, a good timeline template speeds up making your timeline.
Step 2: customizing your timeline
It’s obvious that the second step in making your presentation stand out is changing your timeline. Making the timeline is made easier with a timeline maker, where you can choose from many timeline slides and templates. Generally you can decide the timeline format including colors, fonts, or graphics used.

What’s astonishing is you can change your timeline more by changing the timeline framework. The best thing is this visual timeline will not just organize your data, but also make your timeline presentation more engaging.
So, get creative and make a timeline that shows your project’s path!
Step 3: adding and editing data points
It’s crucial to be aware that in this stage of making the timeline, users can start adding and changing data points to change their timeline. This process is easy with modern timeline maker tools.
Inarguably, many timeline templates are also often available, which can speed up the process and cater to different presentation needs. During this phase, you can change the following things-
- Timeline format
- Changing settings such as the date range, intervals, and colors
The great thing is the timeline graphic can then be further changed to result in a sleek, visual timeline ready for your next presentation.
Step 4: enhancing your timeline with design elements
It’s proven that using a timeline maker has many benefits; most offer many timeline templates, making the timeline simple and fast.
What’s fascinating is you can choose a timeline format that fits your content. Then change the timeline with different colors, and even add timeline images to make it look better.
It’s worth noting that using a timeline template can save you time and make sure you have a professional look. A visual timeline can greatly improve your timeline presentation.
The cool thing is timeline graphics, chosen and designed properly, will add depth and attractiveness to your project timeline. Don’t forget that the design is a key part of making your timeline framework easy to understand as well as impress your audience.
Step 5: finalizing and saving your timeline
After making the timeline, finalize your timeline by editing and changing any necessary elements. Plus, you can add or delete timeline slides, or change the timeline graphic to fit your needs. It comes as no surprise that using a timeline maker can greatly ease this process. This provides ready-made timeline templates and visual timeline generators.
Always make sure to have a backup of your timeline image for future reference or changes. The good news is this timeline presentation can now be used for your project management or academic purposes.
Advanced tips for creating timelines in PowerPoint
There is no doubt that your process of making a timeline in PowerPoint can be made better by using timeline templates. This speeds up making the timeline and makes sure a professional visual timeline. Obviously change and customize the timeline according to your presentation content.
It’s just astounding how a timeline maker lets you make a timeline image or graphic easily! Once the timeline slide is done, check it carefully - the timeline framework should clearly show the project timeline to your audience in a clear and nice way.
When you make a timeline, keep the timeline presentation simple and informative to keep the audience engaged.
Using SmartArt graphics for timelines
It’s a matter of fact that SmartArt Graphics is a useful tool that makes the timeline creation process easier. As a timeline maker, it gives many timeline templates and formats that can be changed to fit your needs. Typically, by following a clear timeline framework, you not only make the project timeline smoother but also make the visual timeline better.
What’s amazing about using SmartArt Graphics for making timeline slides is it is effective for timeline presentation. You can easily turn your data into a timeline graphic or image which improves understanding and absorption of information.
Animating your timeline for a dynamic presentation
To make your timeline presentation more lively, animate your timeline slides. It’s staggering to find out how the timeline creation process can be made interesting using various timeline templates available in any timeline maker! So, pick the right timeline format, and add motion to the timeline images and graphics.

It’s beyond dispute that animated visual timeline graphics add a new view and increase the overall appeal. With this, the timeline presentation becomes more interactive, increasing your project’s understandability. Making a timeline could feel scary at first, but once you get used to the timeline template and timeline framework, the process becomes like a walk in the park!
Exploring third-party tools for creating timelines
It’s well known that third-party tools have greatly made the timeline creation process easier. These include various timeline makers which offer a wide selection of timeline templates in a range of nice-looking formats. Usually, the easy-to-use interfaces let anyone make a timeline with relative ease.
It’s obvious that some favorite features of third-party tools include options to change timelines and adjust the timeline framework to match the specifics of your project timeline. They also provide ways to make your timeline graphic better with images and colors, creating a compelling visual timeline for presentations or timeline slides.
Office Timeline: a powerful add-in for PowerPoint
It’s an undeniable truth that Office Timeline is a dynamic tool acting as a timeline maker. This tool greatly improves the timeline creation process in PowerPoint. It offers various timeline templates, letting users change their timeline format.
It’s crucial to be aware that with Office Timeline, you can do the following amazing things-
- Make a timeline easily
- Add timeline images and graphics to your slides
Prezi: an alternative to PowerPoint for dynamic timelines
It’s proven that Prezi, a dynamic timeline maker, offers an alternative to PowerPoint, offering a more lively and interactive timeline creation process. Prezi’s timeline templates come in a refreshing array of designs. The great thing is it allows users to fully change the timeline framework to fit their needs.
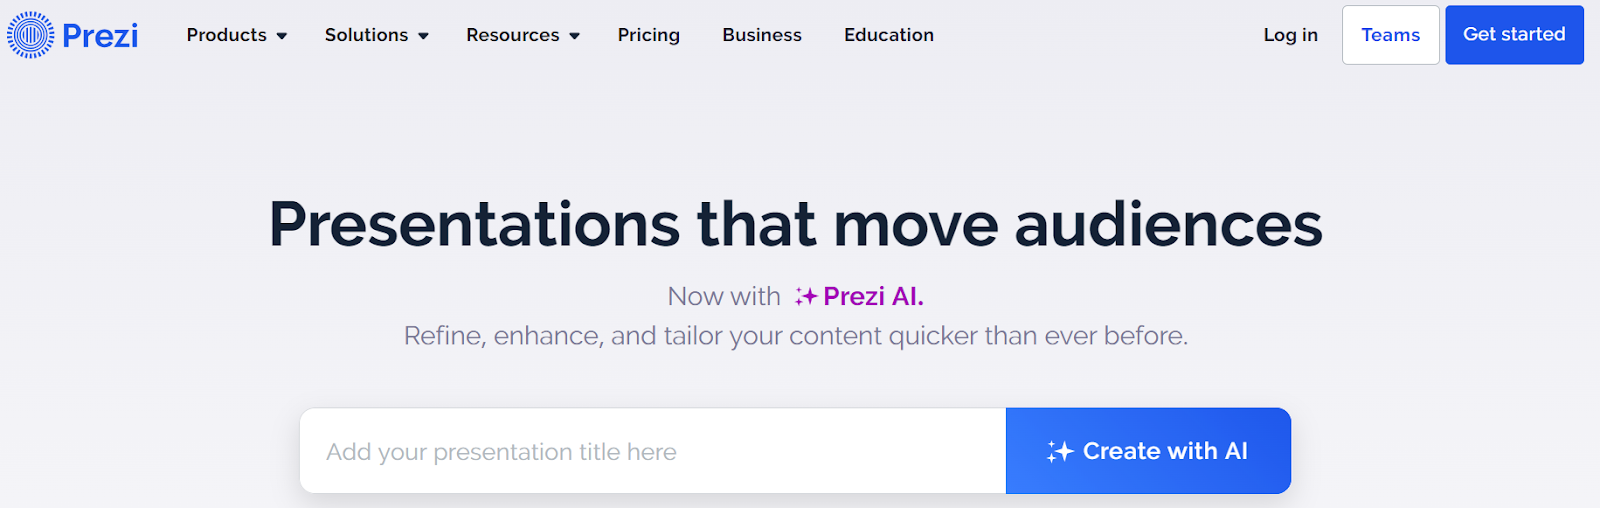
It’s worth noting that this timeline tool provides more flexibility in timeline format, allowing the import of timeline images and the integration of timeline graphics for a more visual timeline. The result is a more engaging and visually-rich project timeline presentation.
Common mistakes to avoid when creating timelines in PowerPoint
It’s significant to note that when making timelines in PowerPoint, there are a few common mistakes to avoid for a more effective timeline presentation. One of the main errors is forgetting the timeline templates available. These templates can provide a clear timeline format and framework. What’s astounding is this makes the timeline creation process easier, making it easier for you to change the timeline.
It’s interesting to point out that another common mistake is filling each slide with complex timeline graphics. Instead, keep your timeline slides clear and straightforward.
Overloading your timeline with information
It’s beyond dispute that making a visual timeline can be a big task, especially if you don’t understand the timeline creation process. Using a timeline maker can make the task easier and provide several timeline templates in different timeline formats.
Interestingly, you have the option to adjust the timeline according to your project needs. Be careful not to fill your timeline slides with too much data. It’s staggering to know how maintaining a clean and straightforward timeline graphic helps for an effective presentation! Don’t forget, a well-made timeline structure aids in better comprehension.
Ignoring the design aspect of your timeline
It’s a matter of fact that making an engaging timeline isn’t just about the content. You need to think about the following things-
- The timeline format
- The process of creating it
- The use of templates
It’s worth noting that these elements are fundamental for effectively communicating project timelines.
Advanced features let you add a timeline graphic, which enhances the presentation. This method helps the audience understand the timeline structure better. So, always pay attention to the design and look of your project timeline to make it more engaging.
Conclusion: mastering timelines in PowerPoint
One thing is for sure: if you can master making timeline slides in PowerPoint, it can significantly improve your presentations. The astonishing thing about using a timeline maker is it aids in the creation process and provides professional-looking templates that you can adjust to your needs.
It’s indisputable that knowing the timeline format and how to adjust timeline graphics can result in more effective visual presentations. Whether you’re making a project timeline or a broader timeline structure, it’s crucial to focus on the clarity and impact of the timeline image. With practice and the right tools, anyone can create an informative and compelling timeline in PowerPoint!


'%3e%3cg id='Final-Copy-2_2_' transform='translate(1275.000000, 200.000000)'%3e%3cpath class='st0' d='M7.4,12.8h6.8l3.1-11.6H7.4C4.2,1.2,1.6,3.8,1.6,7S4.2,12.8,7.4,12.8z'/%3e%3c/g%3e%3c/g%3e%3c/g%3e%3cg id='final---dec.11-2020'%3e%3cg id='_x30_208-our-toggle' transform='translate(-1275.000000, -200.000000)'%3e%3cg id='Final-Copy-2' transform='translate(1275.000000, 200.000000)'%3e%3cpath class='st1' d='M22.6,0H7.4c-3.9,0-7,3.1-7,7s3.1,7,7,7h15.2c3.9,0,7-3.1,7-7S26.4,0,22.6,0z M1.6,7c0-3.2,2.6-5.8,5.8-5.8 h9.9l-3.1,11.6H7.4C4.2,12.8,1.6,10.2,1.6,7z'/%3e%3cpath id='x' class='st2' d='M24.6,4c0.2,0.2,0.2,0.6,0,0.8l0,0L22.5,7l2.2,2.2c0.2,0.2,0.2,0.6,0,0.8c-0.2,0.2-0.6,0.2-0.8,0 l0,0l-2.2-2.2L19.5,10c-0.2,0.2-0.6,0.2-0.8,0c-0.2-0.2-0.2-0.6,0-0.8l0,0L20.8,7l-2.2-2.2c-0.2-0.2-0.2-0.6,0-0.8 c0.2-0.2,0.6-0.2,0.8,0l0,0l2.2,2.2L23.8,4C24,3.8,24.4,3.8,24.6,4z'/%3e%3cpath id='y' class='st3' d='M12.7,4.1c0.2,0.2,0.3,0.6,0.1,0.8l0,0L8.6,9.8C8.5,9.9,8.4,10,8.3,10c-0.2,0.1-0.5,0.1-0.7-0.1l0,0 L5.4,7.7c-0.2-0.2-0.2-0.6,0-0.8c0.2-0.2,0.6-0.2,0.8,0l0,0L8,8.6l3.8-4.5C12,3.9,12.4,3.9,12.7,4.1z'/%3e%3c/g%3e%3c/g%3e%3c/g%3e%3c/g%3e%3c/svg%3e)