


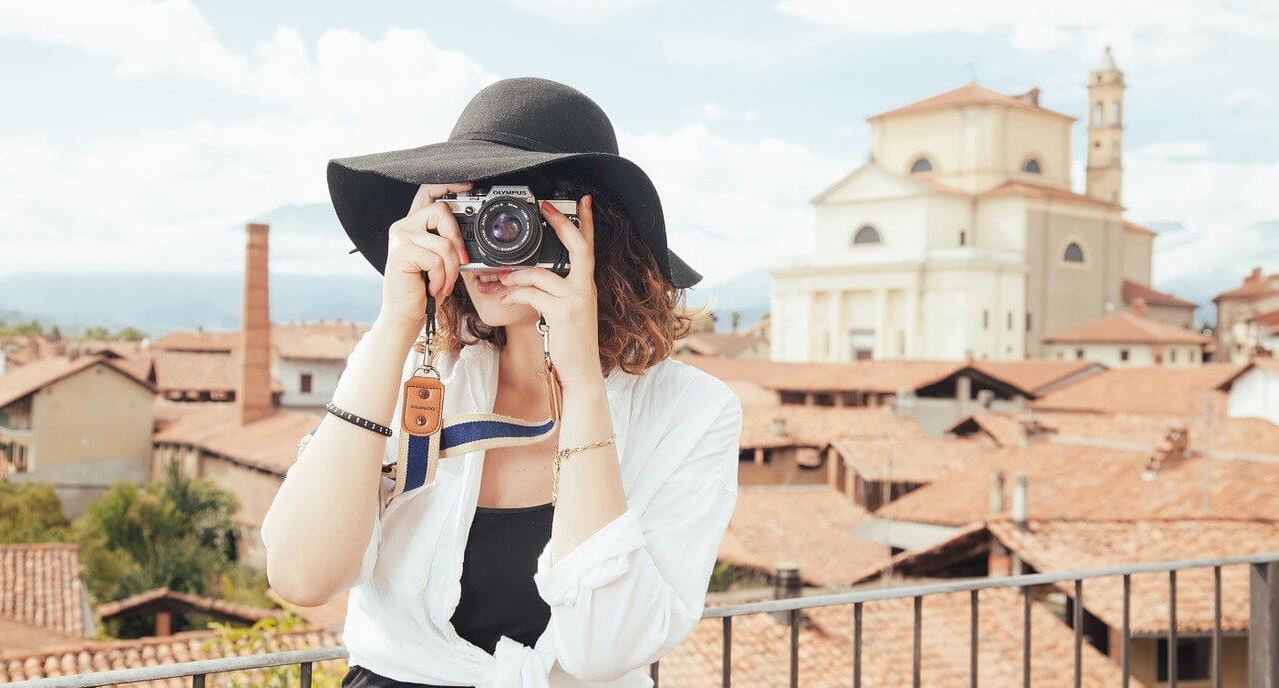
Getting into photography in 2026 involves understanding the basics of digital photography, investing in essential gear, and practicing regularly. Start by learning the fundamental camera settings like aperture, shutter speed, and ISO. Use online resources and communities to gain insights and feedback. Consider taking online courses or workshops to enhance your skills. Whether pursuing photography as a career or a hobby, focus on developing a unique style and building a portfolio. The journey requires dedication, but with the right approach, you can capture inspiring images that evoke emotions. Begin by exploring different photography genres to find your niche.
How to Get Started in Photography
Before you commit time and effort to learn a new skill, you might be wondering: is it hard to get into photography? Photography requires time, commitment, and a whole lot of patience. If you've got all that, you're good to go. Learning how to be a good photographer isn't just about getting the technical elements down. It requires a whole lot of practice, patience, and a whole lot of passion.
How can I teach myself photography?
You'll be glad to know that it's not difficult at all! As we mentioned before, the internet is a treasure trove of detailed resources (online guides, videos, step-by-step tutorials created by experts, etc), so you can find an answer to most of your photography concerns with a simple Google search. There are also plenty of books on offer to take you through each type of photography, camera functionality, and post-production techniques.
That being said, if you start taking photos hoping that they'll turn out just like the ones in magazines—we must warn you, photography is a skill, not an innate ability! Although some people have a better eye for composition or subject matter than others, photography requires technical knowledge as well as creativity. Beginners must take the time to learn about camera settings, composition rules, and everything else associated with taking great photos!
Before you get into photography, find your inspiration!
Before you jump into professional photography, you'll need to find out what type of freelance photographer you want to be.
A great way to get into photography is to get inspired by your surroundings and other photographers. Think about whether you prefer taking photos of people, things, or landscapes. Do you like looking at representational photos or more abstract style ones? Narrowing down what kind of photography inspires you will help you to find a specific direction, particularly if you're considering a career in photography.
What does a beginner photographer need?
As a beginner photographer, you should try to invest in the following things:
- A camera (of course!)
- A few different lenses (prime lens, zoom lens, wide-angle lens, etc)
- Memory card (for storing and transferring all your photos)
- A tripod
- Robust photo editing software
If you already have all of these things, you can easily put theory into practice—which is the best way to learn.
You probably think that photography is an expensive hobby, and... it kind of is. Years ago taking up photography didn't require hordes of equipment or post-processing software. All you required was an analog camera, some rolls of film, and a cheap place to get it developed. Nowadays, it's all gone digital.
However, you can do it on the cheap. Check for second-hand equipment on eBay, or buy during a time of year where shops have sales going on. If you look after this equipment, it should last you for a good few years at least. The only ongoing costs you'll pay is when you want new photography gear like lenses and filters.
If you want to get into taking photos for fun or to share with family and friends, you can probably get away with a lot less equipment. A simple digital camera will do the job, or —if you're being really casual— a good smartphone camera. However, if you're looking to go professional, you'll need the right equipment to ensure photos turn out well every time.
Steps to Get Started in Photography
Before you can start looking for photography jobs, you'll need to develop your skillset and nail down what kind of photographer you want to be.
Below we've outlined so key steps detailing how to get into photography. If you're looking to embark on a full-blown photography career, or you want to use it to make a little money on the side as a freelance photographer—these tips can help.
1. Invest in a good camera
Sure, you could study photography theory for hours and hours and hope that when you pick up your camera it all comes naturally. However, it's more time-efficient to get a good camera and learn how to use it with practice.
Nowadays, newbie photographers have plenty of choices when it comes to good first cameras. Not so long ago there was a huge difference in the price and quality of point-and-shoot cameras and professional, more complex DSLR cameras.
Don't be worried about having to invest in expensive gear to start your photography career. Nowadays, photographers can select from a wide variety of different cameras available to suit all budgets. You can find lightweight, professional mirrorless cameras that are capable of taking high-quality, magazine-quality images without breaking the bank.
Whatever camera you choose, be sure it comes with a great instruction manual to help you learn how to use it. Moreover, make sure it's suited to the type of photography that interests you. Consider what your subject matter will be to better understand whether the standard kit lens is enough, or whether you'll need a lens more suited to landscape photography or portraiture.
There are plenty of camera guides online to help you decide which one is best for you. If you're buying offline in a photography shop, one way to ensure you choose the best camera to suit your needs is to ask the shop owner or an assistant for advice.
2. Get to know the different parts of your camera
Before you begin taking pictures, it's a good idea to get to know the different parts of your new camera. The basic parts of DSLR cameras are as follows:
- Lens: This is where light enters through the camera and the photo process starts.
- Viewfinder: The main visual source for taking pictures. Essentially, it's the part you look through to find and align your subject matter.
- Body: The body of the camera the main part of the camera. They can come in many shapes and sizes, but DSLR cameras tend to have larger, heavier bodies whereas consumer-focused cameras are smaller and lighter.
- Shutter release: The button that controls the release of the shutter and enables the image to be captured.
- Memory card: Where all the image information is stored.
- LCD screen: This screen is found on the back of the camera body and is mainly used for looking at photos after they've been shot.
- Flash: Available on the camera to provide more light in low-light conditions.
- User controls: A DSLR camera usually features numerous controls for shooting in auto mode or manually.
3. Learn how to control your camera settings

Once you know the purpose and function of each part of your camera, you can start figuring out how to control them. The best way for a newbie photographer to learn how to use your camera settings is to use it on manual mode. Sure, auto mode is easy—and sometimes it's enough—but to become a professional freelance photographer, you'll need to study the different settings and what they're used for.
Making manual adjustments to your settings allows you to access a whole new sphere of creative possibilities and outcomes. To capture breathtaking photos, like those ones with blurry backgrounds or perfectly lit night shots, it's best to practice by taking real images. Learn how to manually focus your images to achieve the best depth field, and be sure to read up about concepts like the exposure triangle.
4. Understand the exposure triangle.
Before you start taking photos, you'll need to know about the exposure triangle: aperture, shutter speed, and ISO. Exposure refers to the amount of light that the film or camera sensor picks up. It's important to ensure the correct exposure so that your photos don't end up overexposed (too bright) or underexposed (too dark).
Nowadays, however, it's easy enough to correct photos that are overexposed or underexposed during photo post-processing with editing software like Lightroom or Photoshop. That being said, it can result in a loss of image quality so it pays to know how to find balance within a photo.
Aperture, ISO, and shutter speed can also affect depth of field and motion blurriness or digital noise within a photo. Once you're aware of how each of these things works, you'll be able to use your camera in manual mode. So what does each element of the shutter triangle mean?
Shutter speed
This refers to how much time the shutter opens when the shutter button is pressed. When the button is pressed it exposes the digital sensor to light, so the shutter speed lets you decide how much light you want to let into the camera.
Usually, you'll only want to open the shutter for a fraction of a second to avoid motion blur in the photos you take. However, it depends on the type of photography you want to do. For instance, sports photography requires faster shutter speeds (eg. 1/3800), whereas night photography will require a slower speed.
ISO
ISO is the measure of how bright your photos are going to turn out. Usually, the lowest ISO setting on most digital cameras is 50 or 100. In bright lighting conditions, you'll want to use lower ISO values. However, when there's less light available you should use a higher ISO so that your images are brighter.
However, it's important to know that high ISO settings can result in more digital noise and make your images appear blurry. That being said, most digital cameras these days offer great ISO performance with hardly any grain.
Aperture
We can think of a camera's aperture like the pupil of an eye. When the aperture is wider, more light is allowed to enter the device. Essentially, the aperture influences how much of the scene you're photographing is in focus.
When it is smaller, less light is allowed to enter. As the aperture is widened, the f/number is reduced and an increased light is allowed to enter the camera. Low f/number settings are suitable for low light conditions, but they also make for a shallower depth of field which isn't the best option for photographing landscapes.
First-time photographers need to understand how the exposure triangle affects the outcome of the images they take.
5. Study composition
Sure, part of learning how to get into photography is understanding the technical elements of your camera. But it's not just that. You'll need to understand basic composition rules if you want to take the best photos possible.
Photography isn't just about pointing your camera at an object or a person and clicking the shutter button. Anyone can do that! Instead, take some time to learn how to position subjects and frame shots so that they're attractive to viewers. Here are a few things to consider when composing your photos.
Rule of thirds
This is one of the first photography concepts beginner photographers are likely to come across. The premise is simple. You should divide the frame of your camera into thirds, and ensure that subject matter aligns with these thirds.
Balance
An image should be balanced and even to make it pleasant to look at. Unbalanced photos can make viewers feel uncomfortable or uneasy. Depending on what you're trying to convey with your photo, either can work. However, it's important to note the effect that balanced and unbalanced photos have.
Eye lines
When photographing people, you should understand how eye lines can affect how people view a photo. Eye lines refer to the direction your subject is looking in, and any negative space that lies in front of their face is referred to as "lead room."
Eye lines can help to focus our attention on certain parts of a photo. As well as this, they can also create tension within the photo.
Photography newbies should consider these elements of composition. It's a good idea to look at photos that you really like and see how the photographer has composed them.
6. Take photos!
As we mentioned before, the best way to learn is with practice. No matter how much you study and play with your camera and its setting, if you want to get better at taking photographs you should do exactly that - start snapping!
No matter how much expensive gear you invest in, it won't make you a great photographer just like that. Take your camera everywhere with you and experiment by taking pictures of different subject matter and in varying light conditions. You'll discover different ways to frame your pictures and improve bit by bit.
The most efficient way for first-time photographers to develop their own style is to take as many images as possible. This way, you'll be able to find what subject matter you prefer shooting as well as the type of photographer you want to be. Try asking friends or family whether they need an event shot or if they need some headshots taking. You can even show your images to photographers you know or people with a good eye and ask for their feedback.
As you get better, you can start to think about how to start selling your services professionally.
7. Consider editing software
Sometimes even the best camera on the market doesn't take perfect pictures. Luckily, there are plenty of editing software options on the market to help you improve digital images if you're not satisfied with how they turn out. Whether it's for making minor tweaks or major edits, editing software can make your pictures more striking and professional-looking.
Photography tools like Lightroom, Affinity, and Photoshop allow you to adjust elements like exposure, contrast, saturation, and more to manipulate and enhance your digital images. When editing images, the important thing to remember is to not overdo it and manipulate your work too much.
Getting Started as a Freelance Photographer
Freelancing can be complicated and challenging. If you're ready to start your career as a freelance photographer, you'll need to ensure you have access to the right tools for managing your photography business. That means knowing how to create contracts, manage invoices, track your hours worked and tasks completed, and complete your accounting.
Once you've got your freelancer website or portfolio set up, adorned it with a winning photographer biography, and landed your first client you'll need to cover yourself for all that happens behind the lens.
That means learning how to create a professional freelance contract that outlines the scope of your work, sets the payment terms, covers you in case of late payments, and gives you the security you need to succeed as a freelance photographer.
Sure, you could create a contract from scratch for each new client, or you can make things much easier on yourself with a freelance photographer contract template. Bonsai allows you to do just that. Moreover, Bonsai's contracts offer robust security and build-in digital signature capabilities so that you can rest assured you're completely covered, whatever happens.
How Can Bonsai's All-in-One Platform for Freelancers Help?
Bonsai is an all-in-one software platform for freelancers that uses smart automation to streamline and integrate every step of running a business. From issuing clients with contracts to creating and tracking your invoices, to managing your freelance photography taxes or accounting—Bonsai takes care of all your back-office tasks. This means you can focus on what really matters—taking great pictures that keep your clients coming back for more!
After all, photography is all about creativity—so don't let the administration tasks take all the fun out of it.
Are you ready to launch your freelance career in the wonderful world of photography? Sign up with Bonsai for free today and create your own photography contract template today.


'%3e%3cg id='Final-Copy-2_2_' transform='translate(1275.000000, 200.000000)'%3e%3cpath class='st0' d='M7.4,12.8h6.8l3.1-11.6H7.4C4.2,1.2,1.6,3.8,1.6,7S4.2,12.8,7.4,12.8z'/%3e%3c/g%3e%3c/g%3e%3c/g%3e%3cg id='final---dec.11-2020'%3e%3cg id='_x30_208-our-toggle' transform='translate(-1275.000000, -200.000000)'%3e%3cg id='Final-Copy-2' transform='translate(1275.000000, 200.000000)'%3e%3cpath class='st1' d='M22.6,0H7.4c-3.9,0-7,3.1-7,7s3.1,7,7,7h15.2c3.9,0,7-3.1,7-7S26.4,0,22.6,0z M1.6,7c0-3.2,2.6-5.8,5.8-5.8 h9.9l-3.1,11.6H7.4C4.2,12.8,1.6,10.2,1.6,7z'/%3e%3cpath id='x' class='st2' d='M24.6,4c0.2,0.2,0.2,0.6,0,0.8l0,0L22.5,7l2.2,2.2c0.2,0.2,0.2,0.6,0,0.8c-0.2,0.2-0.6,0.2-0.8,0 l0,0l-2.2-2.2L19.5,10c-0.2,0.2-0.6,0.2-0.8,0c-0.2-0.2-0.2-0.6,0-0.8l0,0L20.8,7l-2.2-2.2c-0.2-0.2-0.2-0.6,0-0.8 c0.2-0.2,0.6-0.2,0.8,0l0,0l2.2,2.2L23.8,4C24,3.8,24.4,3.8,24.6,4z'/%3e%3cpath id='y' class='st3' d='M12.7,4.1c0.2,0.2,0.3,0.6,0.1,0.8l0,0L8.6,9.8C8.5,9.9,8.4,10,8.3,10c-0.2,0.1-0.5,0.1-0.7-0.1l0,0 L5.4,7.7c-0.2-0.2-0.2-0.6,0-0.8c0.2-0.2,0.6-0.2,0.8,0l0,0L8,8.6l3.8-4.5C12,3.9,12.4,3.9,12.7,4.1z'/%3e%3c/g%3e%3c/g%3e%3c/g%3e%3c/g%3e%3c/svg%3e)