


While there are many tools where you can easily create a timeline, they might not always be available to you or you may still need to learn their features before you can create your timeline. When you’re in a pinch, one of the most familiar tools you can use to create a timeline is Word.
Timelines are excellent ways to organize information visually and further optimize the business process. With Word, you have plenty of helpful features that can help you create one from scratch. There are even ready-made templates that you can customize to fit your requirements. The best part is that the process is fairly simple. In this guide, we’ll go through all the steps to create a timeline in Word and further steps you can take to improve upon it.
Understanding the importance of timelines for agencies
To function at their best, agencies need organization with their project information. This helps guide their teams and create steady work progress. One of the best ways to organize this is through timelines.
Timelines give a visual overview of the entire project that is easy to understand. It also provides a quick way for managers to identify parts of the process that need improvement and to optimise it.
Why choose Microsoft Word for creating timelines
Microsoft Word may not always be the first choice when it comes to timeline creation but there are several good reasons to use it. For one, it has a user-friendly interface. You can easily build timelines manually through basic knowledge of the app.
Another thing is that Word already has Simple and Basic Timeline formats. You can choose from these to quicken the process. And you can use SmartArt graphics to make it more visually engaging. Furthermore, the created timeline can be easily updated or tweaked, making project management more efficient.
Creating a basic timeline in word
If you’re already familiar with the basic functions of Word, creating a basic timeline would be fairly simple. One of the reasons for that is because Word already has built-in timeline templates that will allow you to set up your new timeline in minutes. Here’s a simple guide for that.
Using word's built-in timeline template
After creating a new document, go to the “Insert” tab and click on “SmartArt.” Then, go to “Process” and choose a timeline layout from the various timeline formats there like the Basic Timeline or Simple Timeline.
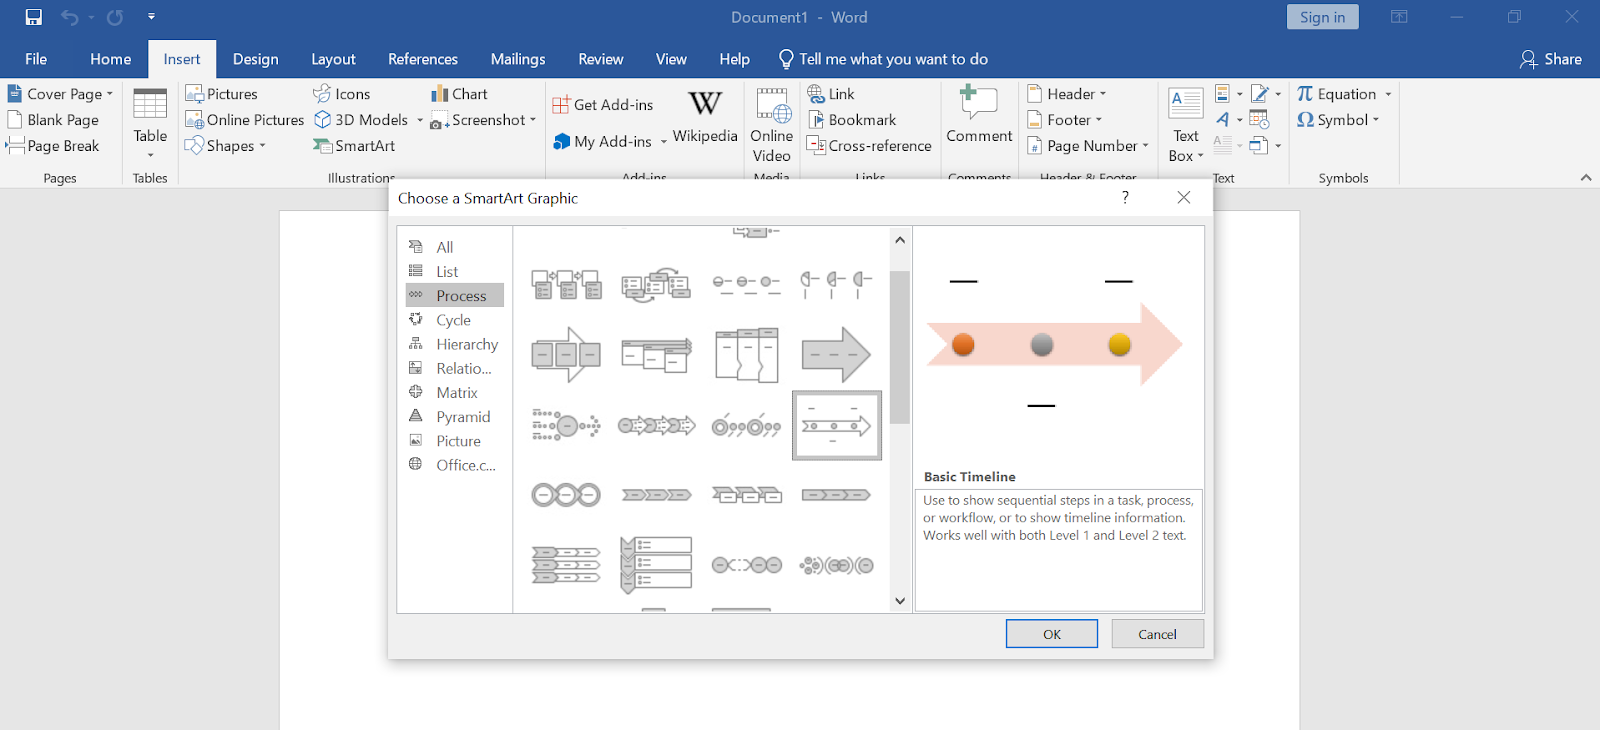
From there, you can then customize the template to suit your specific needs. This is made easy with Word’s SmartArt graphics. You can modify colors, fonts, titles, and others. This gives your project timeline a personalized touch, making it easier to understand and appealing to the audience. Don't forget to add a title for reference.
Remember, building a timeline is not just about giving dates. A well-crafted and visually appealing timeline can enhance the understanding of your project details. Whether it's a Simple timeline or a complex one, make sure to edit and modify as needed.
After assembling your timeline, make sure to save your document. These steps make it quick and easy to generate professional timelines that accurately display project progress or historical events.
Advanced timeline creation in word
Word’s timeline templates simplify the process of creating simple timelines for simple information. But it can also be modified to accommodate more complex information for all kinds of projects. Here are some ways to do that.
Using SmartArt for more complex timelines
When you need to create a timeline for complex project information, SmartArt graphics is the tool to use. With SmartArt, you can customize your timeline layout to suit your needs. You have control over every detail, from the way the timeline is structured and how you add a title to the fonts, colors, and shapes in it. This way, you have a clear, visual representation of your project's progress and its future direction.
Adding images and icons to your timeline
Another way you can further personalize your timeline is by adding images or icons. To do that, simply click on your timeline and pick the spot where you’d want to insert an image or icon. To insert a picture manually in Word, click on "Insert", then "Pictures". For icons, tap on "Icons". Modify timeline formats so they best suit your project information.

You can adjust the size, colour and position of your icons or images to better demonstrate the project timeline. This is how you can build a timeline that is not just functional but visually appealing too. Don't forget to save your new Word document regularly in the process to not lose your work.
Using external tools to create timelines for word
While Word may have templates for timelines already, it may still lack certain features that teams may need to more accurately display their project progress and work. That’s where external tools come in. Fortunately, many of these tools also already have timeline templates readily available to be customized according to the project information.
Most of the time, you can also simply copy and paste these timelines to a Word document where you can further edit it to come up with an ideal output. Here are some tools worth looking into.
Creating a timeline with Microsoft Excel
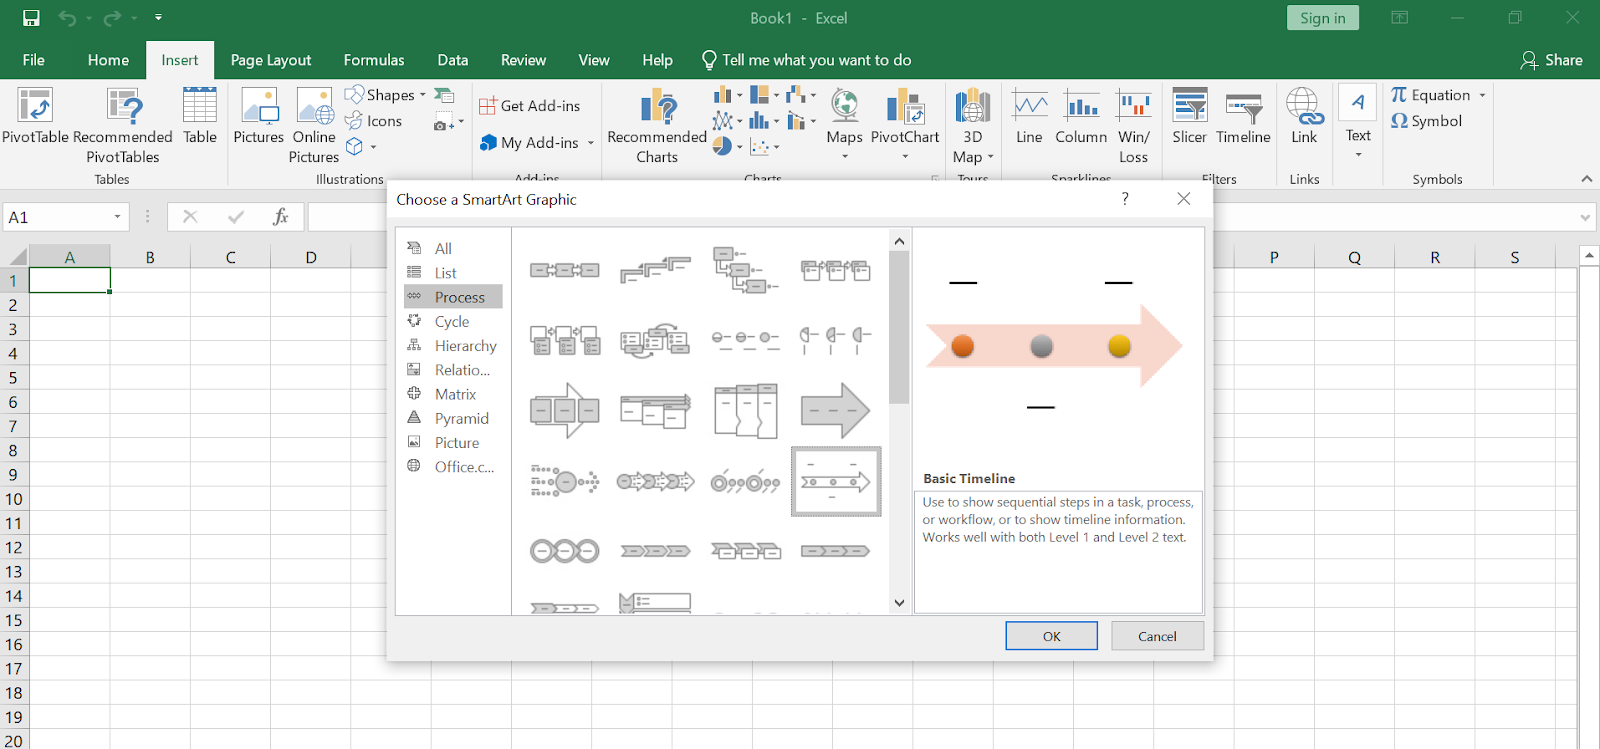
Much like Word, Microsoft Excel already has existing timeline templates to help make the creation process easier and quicker. Open a new document on Excel then go to SmartArt graphics and select “Basic Timeline.” From there, you can add your project details and adjust it to how you want it to look.
Working manually in Word, you can switch between different timeline formats to make your Simple timeline visually appealing.
Creating a timeline with Microsoft Project
To create a timeline with Microsoft Project, you first need to enter the project information. From there, you can build a timeline using the built-in features the application offers. The best part is that the timeline templates, timeline layouts, and timeline formats are all customizable so you can manually design your timeline in the way you see fit.
If you want to further enhance the visual appeal of your timeline, you can use SmartArt Graphics on Word as well.
Importing timelines from other tools
You don’t have to be limited by Word’s basic timeline templates. Importing timelines from other tools can help give you more options to work with. Then, you can import the timelines to a new Word document and continue modifying them until you’re satisfied with the results.
Using Basic Timeline or other timeline templates and formats, you can easily customize the timeline to match your project layout. Whether it is a Simple timeline or a project timeline using SmartArt graphics, you can always tweak it, add a title and much more to suit your requirements.
Create a timeline that suits your needs now!
Microsoft Word is a powerful tool that can greatly help teams operate more efficiently. One of the ways it can do that is through the creation of basic timelines. Word’s features make it simple to do. It also allows great customization so you can create a timeline that shows information accurately and in a visually appealing manner. The key is knowing how to use Word’s features to their fullest. Start creating efficient timelines now!


'%3e%3cg id='Final-Copy-2_2_' transform='translate(1275.000000, 200.000000)'%3e%3cpath class='st0' d='M7.4,12.8h6.8l3.1-11.6H7.4C4.2,1.2,1.6,3.8,1.6,7S4.2,12.8,7.4,12.8z'/%3e%3c/g%3e%3c/g%3e%3c/g%3e%3cg id='final---dec.11-2020'%3e%3cg id='_x30_208-our-toggle' transform='translate(-1275.000000, -200.000000)'%3e%3cg id='Final-Copy-2' transform='translate(1275.000000, 200.000000)'%3e%3cpath class='st1' d='M22.6,0H7.4c-3.9,0-7,3.1-7,7s3.1,7,7,7h15.2c3.9,0,7-3.1,7-7S26.4,0,22.6,0z M1.6,7c0-3.2,2.6-5.8,5.8-5.8 h9.9l-3.1,11.6H7.4C4.2,12.8,1.6,10.2,1.6,7z'/%3e%3cpath id='x' class='st2' d='M24.6,4c0.2,0.2,0.2,0.6,0,0.8l0,0L22.5,7l2.2,2.2c0.2,0.2,0.2,0.6,0,0.8c-0.2,0.2-0.6,0.2-0.8,0 l0,0l-2.2-2.2L19.5,10c-0.2,0.2-0.6,0.2-0.8,0c-0.2-0.2-0.2-0.6,0-0.8l0,0L20.8,7l-2.2-2.2c-0.2-0.2-0.2-0.6,0-0.8 c0.2-0.2,0.6-0.2,0.8,0l0,0l2.2,2.2L23.8,4C24,3.8,24.4,3.8,24.6,4z'/%3e%3cpath id='y' class='st3' d='M12.7,4.1c0.2,0.2,0.3,0.6,0.1,0.8l0,0L8.6,9.8C8.5,9.9,8.4,10,8.3,10c-0.2,0.1-0.5,0.1-0.7-0.1l0,0 L5.4,7.7c-0.2-0.2-0.2-0.6,0-0.8c0.2-0.2,0.6-0.2,0.8,0l0,0L8,8.6l3.8-4.5C12,3.9,12.4,3.9,12.7,4.1z'/%3e%3c/g%3e%3c/g%3e%3c/g%3e%3c/g%3e%3c/svg%3e)